2012....not a very productive year really mainly due to problems spraying paint and varnish (cold, damp and compressor problems), having said that I did do 21 kit reviews for Model Military Int'l plus two full articles so at least my loft is well insulated :o)
On this blog there are projects that I started this year but never finished due the issues detailed above; The Tristar Storch needs a complete repaint and the dihedral (or lack of) fixing, plus there are two visible sink marks on the top of the wings so that's been moved to the Shelf of Doom; The 1/48 Hasegawa P-51D has been sanded back to try and remove the gritty look and that has been fairly successful, the only thing that spoils it is the star and bar decal has a triangular looking divot in it where the Johnsons Kleer melted when I tried to steam the decal on....bugger. A least it will be finished and sit on the shelf; The Hasegawa Ju87B is ongoing and up to the painting stage so maybe that will get finished in the new year and finally the AFV Club 1/35 Sturmtiger which HAS had the base coat put on but little else due to lack of interest. Sue me! :o)
2013 looks to be another great year for modellers with LOADS of new stuff coming out but technically speaking I really should'nt buy anymore kits ...YEAH RIGHT! LOL!!!! Revell are doing their 1/32 BAe Hawk in RAF camo, Meng have released the Me 410, Airfix have an 1/48 Gloster Javelin in the pipeline.....lots of shiny things :o)
Have a great Christmas people and here's to 2013!
Monday, 24 December 2012
Wednesday, 5 December 2012
Hasegawa 1/48 F-104C Starfighter
I got this kit at the Telford 2012 show for a good price and although I do have other things on the go I have made a start with the sole intention of building it straight from the box, that is until I started reading the superb new Daco book 'Uncovering the Lockheed F-104G Starfighter'. So I've added a bit of detail to the cockpit using Eduard etch and some homemade bits;

The version I want to build is an F-104C that flew in the Vietnam war circa 1966 and the plastic lumps on the cockpit coaming panel are meant to represent the RHAW (Radar Homing And Warning) gear that was fitted to the Starfighters during the conflict. I've made an attempt to depict the de-mister tubes that fit on the inside of the canopy using 15 amp fuse wire and styrene sheet, some tube and wiring was added to the rear of the cockpit tub and all that was used of the kit seat was the base and headrest. So much for an out-of-the-box build :o)

The version I want to build is an F-104C that flew in the Vietnam war circa 1966 and the plastic lumps on the cockpit coaming panel are meant to represent the RHAW (Radar Homing And Warning) gear that was fitted to the Starfighters during the conflict. I've made an attempt to depict the de-mister tubes that fit on the inside of the canopy using 15 amp fuse wire and styrene sheet, some tube and wiring was added to the rear of the cockpit tub and all that was used of the kit seat was the base and headrest. So much for an out-of-the-box build :o)
Sunday, 18 November 2012
Friday, 16 November 2012
Compressor is fixed
With thanks to the lovely people at Airbrushes.com I have fixed my compressor. The problem was indeed a faulty Auto Pressure Stop Sensor and a replacement arrived a day after I ordered a new one. Outstanding! I now have air :o)
The next job is to fit an external air tank so that as well as having a resevoir of air it reduces wear and tear on the compressor too.

The next job is to fit an external air tank so that as well as having a resevoir of air it reduces wear and tear on the compressor too.

Monday, 12 November 2012
Paint spraying woes part 2
You may remember (or not) my problems with spraying paint and matt varnishes due to the cold and damp in the house, due to the burst water pipe under the house WELL just to add insult to injury my compressor has just died.
I think the problem is with the Air Pressure Auto Stop switch as I removed it and it was full of white calcium deposits but until I get a replacement part I'm pretty much screwed for now.


I think the problem is with the Air Pressure Auto Stop switch as I removed it and it was full of white calcium deposits but until I get a replacement part I'm pretty much screwed for now.


Scale Model World, Telford 10/11 Nov 2012
Well that was a great show! I've been going for a few years now but this years show was bigger than ever and accompanied with good friends made it very memorable. For me the highlight of the show was the Royal Navy Lynx HMA 8 (Serial Number ZD265) and being able to photograph it VERY close up. I was displaying some models on the 580 Modellers table and the weekend was made more enjoyable sharing it with this great bunch of guys.
There was a LOT to see and as usual missed loads of great models as I was either shopping or yapping :o) Thankfully there are many pics on various web sites of the show.
Great to see newcomers to the hobby Meng Models this year as the stuff they are doing so far is fantastic and for their wish list I've asked for an M60A1/A3 in 1/35 and a OV-10 Bronco in 1/48, nice pen to fill in the card with too and the rather fancy red and black shopping bag.
Apparently next years show will be celebrating 50 years of the IPMS so I can't WAIT to see what they pull off for that one :o)
Great weekend, great company, great to see old friends and great to make new ones.
Sunday, 21 October 2012
Almond Sculptures 90mm British Hussar revisited
So as the damp issue is preventing me from spraying tanks and planes I'm turning my hand to another aspect of modelling I enjoy from time to time and that's painting figures. Compared to what some people can do my stuff is pretty naff but I enjoy it.
I was given this figure many years ago by a good mate of mine which when painted was rather good (for me) at the time, however the years have taken it's toll and it has been stored in a box for ages so after cleaning the original paint off with Mr Muscle oven cleaner (toxic but GREAT for paint removal), cleaning up various joints and repairing the bits that fell off it was primed with Games Workshop Skull White.
Here's the 'Before' shot;
 Here it is after the cleaning;
 And the head after painting;

The moustache still needs painting but so far I'm quite pleased with it. Just out of interest the figure is a 90mm one by Almond Sculptures of a British Officer of the 7th Hussars 1814-15. This should keep me quiet for a bit but if it does'nt I have another 90mm figure (kindly donated by a neighbour) of a French hussar on horseback :o)
Update; I got the tunic and Pelisse painted with a very nice Vallejo blue HOWEVER the damned paint went shiny which kills a model figure straightaway. I did try matting it down with Lifecolour matt varnish but this has still left a sheen SO I've got some Lifecolour blues coming via mail order and try those instead.
Update 2; Well the Lifecolour stuff did'nt go on much better either so next to try is Andrea but this won't be until the new year (2013) so yet another project shelved for now. This is getting frustrating...
I was given this figure many years ago by a good mate of mine which when painted was rather good (for me) at the time, however the years have taken it's toll and it has been stored in a box for ages so after cleaning the original paint off with Mr Muscle oven cleaner (toxic but GREAT for paint removal), cleaning up various joints and repairing the bits that fell off it was primed with Games Workshop Skull White.
Here's the 'Before' shot;


The moustache still needs painting but so far I'm quite pleased with it. Just out of interest the figure is a 90mm one by Almond Sculptures of a British Officer of the 7th Hussars 1814-15. This should keep me quiet for a bit but if it does'nt I have another 90mm figure (kindly donated by a neighbour) of a French hussar on horseback :o)
Update; I got the tunic and Pelisse painted with a very nice Vallejo blue HOWEVER the damned paint went shiny which kills a model figure straightaway. I did try matting it down with Lifecolour matt varnish but this has still left a sheen SO I've got some Lifecolour blues coming via mail order and try those instead.
Update 2; Well the Lifecolour stuff did'nt go on much better either so next to try is Andrea but this won't be until the new year (2013) so yet another project shelved for now. This is getting frustrating...
Thursday, 11 October 2012
Due to problems with spraying paint (owing to damp in the house) I won't be building anymore models for a while until the house dries out. The damp issue would explain the frosting and blooming I've been experiencing when spraying matt varnish and also the grainy, pebbly finish I've been getting with various paints. So I can't spray with an airbrush at the moment but I can still paint with a brush so BUGGER IT! I'll paint model figures instead!
There is no freaking way I'm going to stare at the television until the house dries out so that's my plan and it just so happens I have a few figures in the stash somewhere. Sorted!
There is no freaking way I'm going to stare at the television until the house dries out so that's my plan and it just so happens I have a few figures in the stash somewhere. Sorted!
Sunday, 9 September 2012
Well scratch one Tristar Storch! It's one of those kits that started going wrong as soon as the paint went on so bugger it. The final coat of matt varnish showed up the huge sink marks on the upper wing surfaces plus it frosted in places so it's on the Shelf-of Doom (TM) pending it's fate.
Meanwhile....A Hasegawa 1/48 Ju87B has appeared on the bench plus I'm putting the final bits together on the P-51D AND I'm eyeing up an Eduard 1/48 Fw190D-11 just for laughs :o)
Oh and there is paint on the Sturmtiger too YAY!
Meanwhile....A Hasegawa 1/48 Ju87B has appeared on the bench plus I'm putting the final bits together on the P-51D AND I'm eyeing up an Eduard 1/48 Fw190D-11 just for laughs :o)
Oh and there is paint on the Sturmtiger too YAY!
Monday, 20 August 2012
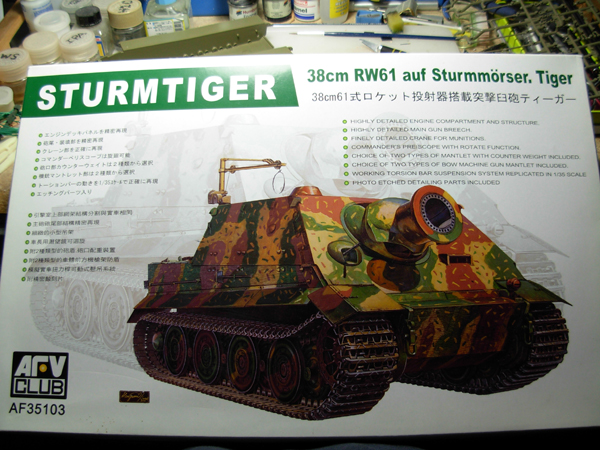
Sturmtiger built
Here's a look before it's washed down then painted. Built straight out of the box, the only exception being the tracks (which are by AFV Club), the wooden block for the jack, fuse wire for grab handles and the zimmerit. I did expect a load of trouble with this kit but it was'nt that bad, just some omissions in the instructions such as the cable reel on the winch.
I did make a couple of minor changes such as the front and rear hull tow hook locations as AFV Club used the hull from their late production Tiger andSturmtigers were based on mid-production models. The brackets for the jack were made from brass strip as the position of the jack was turned 90 degrees on the Sturmtiger, also a wooden jack block was added as to the rear hull as AFV Club missed it off all together.
So with a bit of luck it'll be finished in time to put it on the 580 Modellers table at Telford in november, maybe with a 1/35 Storch too....MAYBE even a 1/48 Ju87 which is next on the list.


You can see in the 2nd picture where I altered the brackets for the towing lugs. I normally glue the tracks to the wheels but as the tracks are a 'workable' type I can paint them seperately and fit them later
Monday, 13 August 2012


Friday, 20 July 2012
So far the hull has gone together very well and I've applied the zimmerit using Milliput. I did this by mixing some Milliput together and leaving it for 20 minutes or so, then I rolled it flat on a small sheet of glass (with a very small amount of petroleum jelly to stop it sticking).
I applied the Milliput to the hull sides and used the Modelkasten Zimmerit Roller set for the pattern (Hint: get the Trumpeter zimmerit roller set for half the price...D'OH!) and here's the result;
 I'm quite pleased with it! :o)
I applied the Milliput to the hull sides and used the Modelkasten Zimmerit Roller set for the pattern (Hint: get the Trumpeter zimmerit roller set for half the price...D'OH!) and here's the result;

Friday, 13 July 2012
Sunday, 29 April 2012
Tristar Storch camo done....
Next the yellow ID panels under the wing and around the fuselage. I might even get some decals on before Christmas...


Saturday, 28 April 2012
Tristar Storch update
This is where I am so far, the model is masked ready for the last camo colour;

Once this is on the model will get a coat of Tamiya X-22 Clear for the decals. I'm hoping Tristar have decent decals otherwise it will get a repaint :o)

Once this is on the model will get a coat of Tamiya X-22 Clear for the decals. I'm hoping Tristar have decent decals otherwise it will get a repaint :o)
Tuesday, 3 April 2012
Another save from the Shelf of Doom; Trumpeter 1/35 KV2
This is a kit I started about 5 years ago then got rapidly bored with, mainly after a bad reaction with the original black primer I used to use. I sanded it back then re-primed with Games Workshop Chaos Black but soon after it was put into the box and quietly forgotten...until this week.


 Makes a change from German WW2 armour I s'pose :o)


Monday, 2 April 2012
Tristar Storch update
Well the build is finished but after spraying some RLM 02 Grau onto the canopy it highlighted the gaps between the canopy and the wings so to avoid sanding I used Milliput instead, smoothed over with a wet brush then a cotton wool-bud. When it's dry I can get on with painting it. YAY!
 I'm quite pleased with the way it has turned out. To be honest I did expect some hassle with the canopy as it is a complicated shape but Tristar have done a pretty good job.

Tuesday, 27 March 2012
Some more older stuff
I was photographing some of my old stuff for a friend of mine so I thought I'd post it here too. The first is the Tamiya 1/48 Skyraider in the markings of 'Bubbles n Bust' of the 602nd SOS, USAF Nakhon Phanom 1970;


 Also I made this one MANY years ago and it was a conversion of the Airfix 1/72 Canberra B6 to a B2/6 of the Royal Aircraft Establishment painted in the 'Raspberry Ripple' scheme. The nose was cast in resin from a mould I made myself as nobody made a commercial set for it;


Tristar Storch update + Hasegawa P-51D pulled from the Shelf of Doom
So this is where I am with the Storch, just the wings to fit then I can give it a wash and paint;
 It's essential that you coat the canopy with Johnsons Klear or similar as you will have to use cyano to fix the canopy and the undercarriage struts, The cyano will fog clear plastic otherwise.
Also while I'm on a roll I've restarted this Hasegawa P-51D;

The cockpit was painted and fitted last night and the fuselage glued together (hence the masking tape everywhere). To be honest the fit of the wings is superb and no filler will be required, which is surprising cos I cut out the flaps :o)
I'm building it as an early one so I've had to hack the fillet from the front of the fin and there will definitely be some filler required.
Saturday, 24 March 2012
Hobbyboss RSOV finally done
Here it is, basically a sound kit in need of some tweaking;


 I kept the weathering to a minimum, just giving it a dusty look like it is in the Middle East 'somewhere' :o)


Friday, 16 March 2012
VK1602 Leopard finished
Well its finally done and a lovely little kit to put together as well. This will appear in Model Military Int'l magazine soon;


Tuesday, 21 February 2012
Tristar Storch; So far so good
Well it's not bad really, just a few bits to add to the cockpit that Tristar missed but nothing too outrageous lol. The fit of the exhausts to the cyclinders was a bit hit and miss (mainly miss) and really I should have drilled and pinned them. Not a big issue as you won't see them with the cowlings on but if you are planning to expose the engine then its something to think about.


Friday, 17 February 2012
Time to make a plane
So in between the VK1602, RSOV and the sWS summat or other I fancy building this;
 Sorry for the picture quality but its via my phone.
By the way its the Tristar 1/35 kit and it looks VERY nice in the box, how it goes together remains to be seen so stay tuned :o)

By the way its the Tristar 1/35 kit and it looks VERY nice in the box, how it goes together remains to be seen so stay tuned :o)
Wednesday, 15 February 2012
Hobbyboss 1/35 RSOV
This is the Rangers Special Operations Vehicle as kitted by Hobbyboss. There is not a lot of info available but what I did find I've used to tweak the kit. A review of the kit will feature in Model Military Int'l magazine soon, hopefully followed by the article to correct it..D'OH! :o)


Hopefully I can get some paint on it soon.


Hopefully I can get some paint on it soon.
Saturday, 21 January 2012
SWS and VK1602 updates
Finally got around to painting these two. First the GWH SWS;
 Then the Hobbyboss VK1602:
 All the camo was sprayed freehand then touched up with the base colour after to get rid of the overspray.
Hopefully I can get some gloss varnish on the VK1602 tonight. More later...


Hopefully I can get some gloss varnish on the VK1602 tonight. More later...
Sunday, 8 January 2012
Alpine Miniatures 1/16 Panzer Leutnant figure
I originally painted this figure a couple of years ago but was never happy with the way the face turned out plus the paint was too shiny on the trousers, which sometimes happens with certain Vallejo acrylics.
Anyway I repainted the face about a month ago, sprayed Lifecolour matt varnish onto the trousers to kill the sheen and actually made a proper base. I think it looks a lot better!
The original figure from a couple of years back;


And now the (finally) finished piece;


Anyway I repainted the face about a month ago, sprayed Lifecolour matt varnish onto the trousers to kill the sheen and actually made a proper base. I think it looks a lot better!
The original figure from a couple of years back;


And now the (finally) finished piece;


Subscribe to:
Posts (Atom)