Thursday 25 January 2018

Airfix 1/48 P-51D Mustang

The fuselage has been closed up and I can now get on with the rest of the build. Airfix have done the tail as a separate assembly which is odd however if you look carefully they have moulded in an offset to port so maybe that's why they did it. Anyway dry fitting the tail assembly revealed a couple of issues which prevented it from fitting properly so after a think I decided to cut off the locating pegs at the front of the tail and the small ledges that sit inside the rear fuselage;


After this the fit of the tail unit was much better although I think I'm going to have a couple of awkward filling jobs around here as the area in front of the rear tail wheel housing isn't a stellar fit either.

Tuesday 23 January 2018

Airfix 1/48 P-51D Mustang

Just a quick update to the Airfix P-51 cockpit. I resprayed the Eduard coloured etch first and using a paint brush moistened with Tamiya thinner wiped the green paint off the placards. 
I lightened the mix with some yellow and sprayed in between the panels to add some interest then oversprayed the entire cockpit with AK ultra matt varnish to deaden the shine of the Eduard coloured etch and to cover up the blobs of superglue.
I'll drop some Tamiya X-22 into the instrument dials to represent the glass and do some chipping with a silver pencil for some wear and tear, the cockpit floor will be given some brown chipping to represent some wear to the floorboards.
There are a couple more details to add yet but hopefully I'll be able to close up the fuselage soon;


Monday 22 January 2018

Airfix 1/48 P-51D Mustang

Just a small update as I've been concentrating on the cockpit. I've been using an Eduard Zoom set for this and it is a pre-coloured one so most of the bits have been added after painting the cockpit colour...trouble is I hadn't given a thought to the fact it was a pre-coloured set and realised that the shade of interior green Eduard had chosen was a LOT lighter than the mix I had made..bugger!


You can see the difference better here (the Eduard bit is at the bottom and much lighter);


I still have the mix used for the cockpit colour so sometime this week I'll respray the Eduard bits then give the whole cockpit a coat of matt varnish as the coloured etch has too much of a shine for me, plus it will deaden the areas where I managed to blob superglue.
Once the matt varnish is dry I'll drop some Tamiya X-22 Clear into the instrument faces to represent the glass covers.
Of course before I do all this I need to add the HGW seatbelts as they'll be a laugh to fit and no doubt the paint on the seat will be damaged in the process.

Saturday 20 January 2018

Airfix 1/48 P-51D Mustang

I've heard a lot about this kit since it was released so when my son asked me what I wanted for Xmas I requested this as a gift. As I knew it was coming I ordered a few goodies such as Eduard Brassin wheels and exhaust stacks (both types just in case) plus an Eduard ZOOM set for the cockpit and HGW seat belts.
I wasn't really planning on starting it straight away but after seeing a couple of builds online I decided to open the box and get cracking as the last time I built a Mustang ended in failure and it went to land fill.
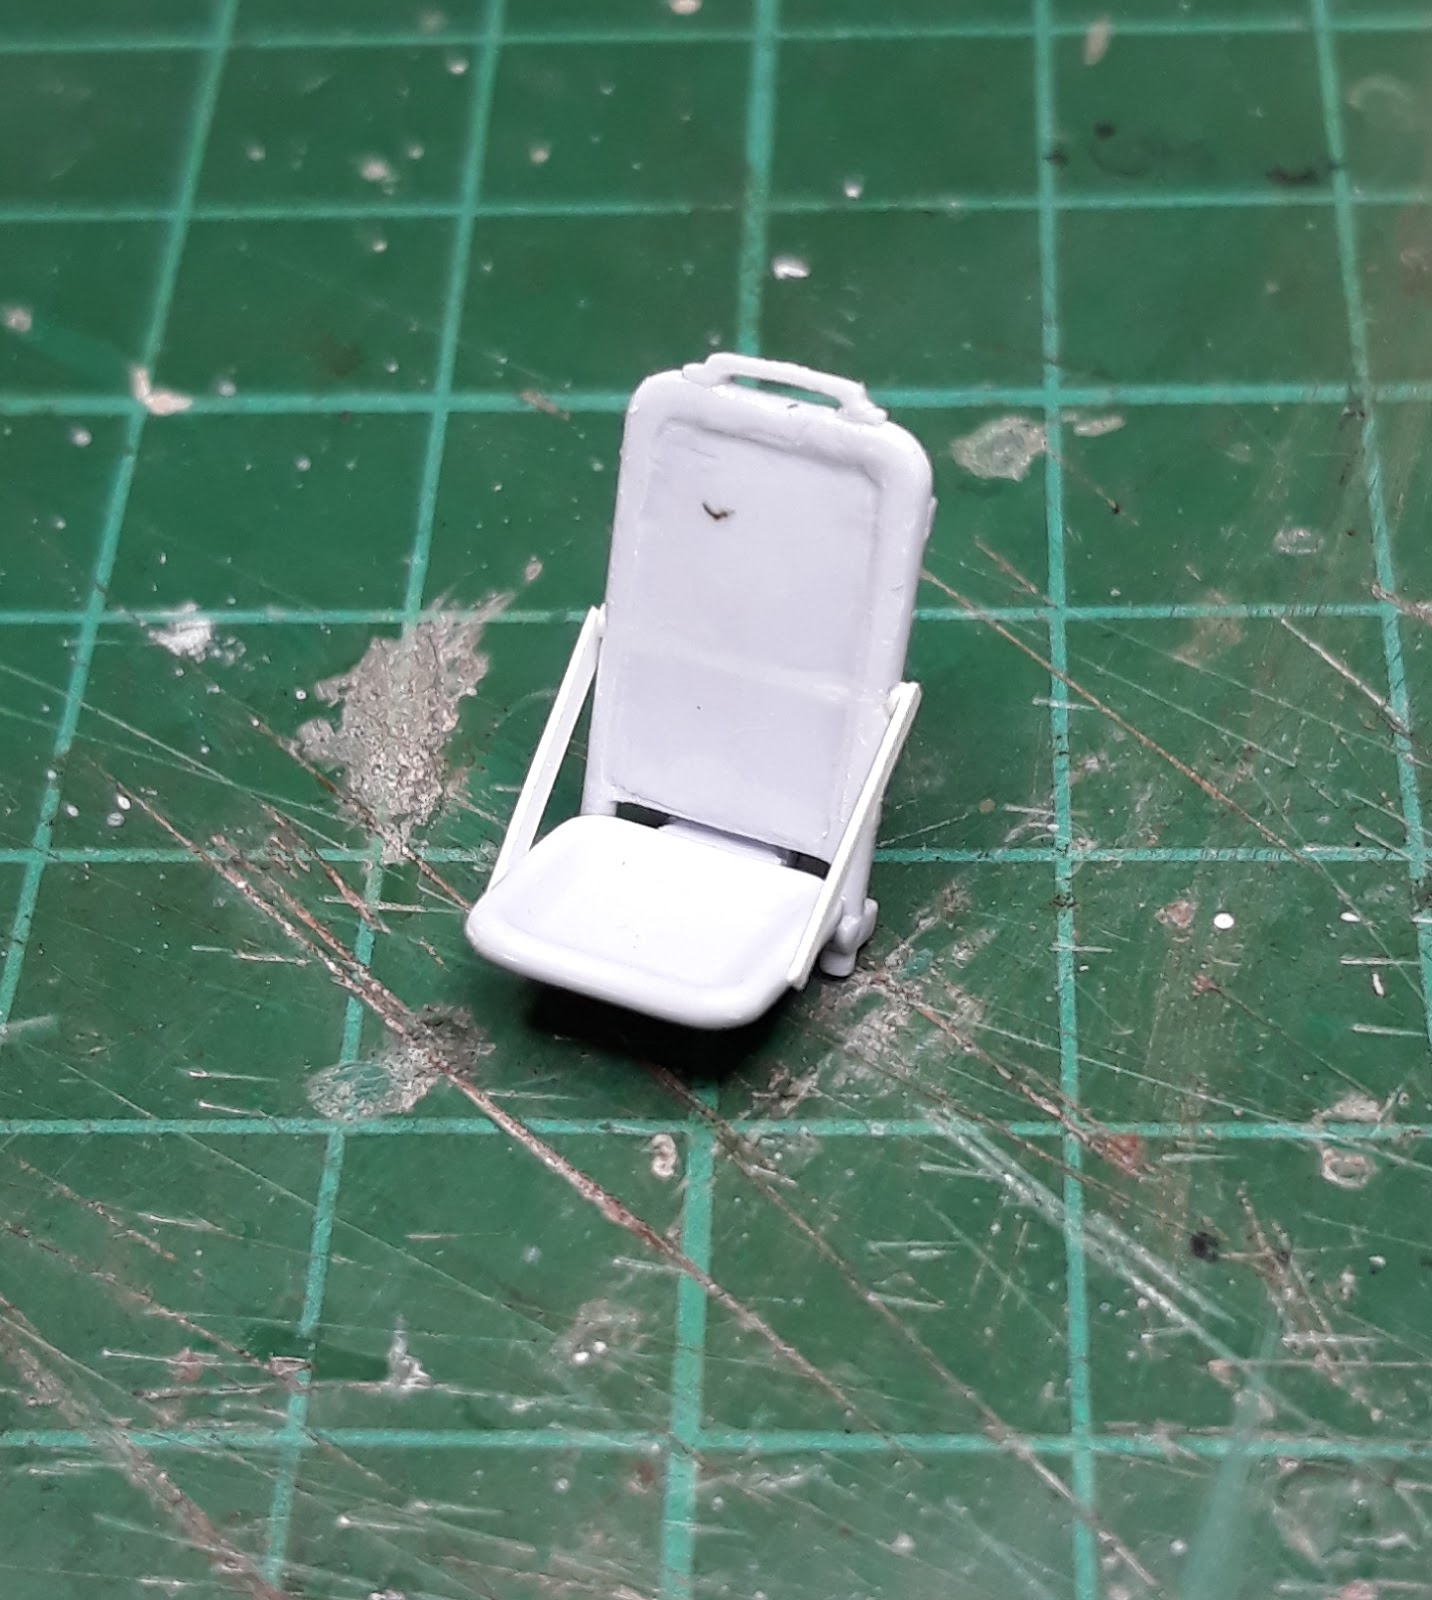
The very first job was to remove the moulded on seat belts and seat cushion so using a Trumpeter micro chisel the detail was scraped off, smoothed out with wet and dry paper then I run liquid glue over it, the side rails were replace with strip styrene;


The interior is quite busy due to the intake duct for the oil cooler, cockpit and tail wheel housing and it will need careful painting. The cockpit side panels have a couple of pin marks present that require filling so this was done with a blob of superglue and when set will be sanded down.
As I'm using a pre-painted etch set I'll need to match the colour then add the etch when the cockpit is painted. This bit will be interesting as there are three different colours involved such as cockpit green, black and aluminium so some painting will be required before gluing it all together such as the oil cooler intake duct and tail wheel bay.

Edit; I should add that I actually started this kit last week but even so to get the cockpit roughly painted in such a short time is unusual for me as it normally takes me weeks to open the box. Anyway I sprayed it all black first then mixed up some Tamiya XF-4 Yellow and XF-5 Green until I got a shade as near as dammit to Interior Green, the oil cooler intake duct will be sprayed with Vallejo Metal Colour aluminium tomorrow.
After this I'll smarten up the interior with some brush painting, fix the seat belts in then give it a pin wash with dark brown or similar. I should then be able to glue the fuselage together.


Busy!

As well as all the other projects on the go such as the Leopard C2, ZiL-131 and E-75 tank destroyer I made a start on the Revell T.I.E Interceptor and Airfix 1/48 P-51D Mustang (which will be a separate blog entry), also I received a Miniart 1/35 T-55A Mod 1965 from the factory in the Ukraine to do as a build review for The Modelling News so all in all it's going to be a busy period of modelling for a few months.


The T-55 will be interesting as although it's one that doesn't feature a full interior there are still around 800 parts to deal with, the TIE Fighter I have an idea for a base to display it and the P-51 was a Xmas present from my son and after seeing a few builds online I just fancied putting it together.
Here's the link to The Modelling News;

The Modelling News


Sunday 14 January 2018

Circle cutter review

I received a new circle cutter that I saw advertised by Uschi Van Der Rosten recently. It was claimed that it could cut circles down to 1.5mm so I bought one just to see if that claim held up.
I do have an Olfa compass cutter that I bought years ago but the cutting diameter is limited to around 5mm or more even after cutting down one side of the compass point.


The advantage of this circle cutter is that the blades can be found in box cutter type knives that are readily available in hardware stores, when blunt you just break another blade off the strip and replace it.
It's quite a compact design and feels quite sturdy when using it, and as to the claim it can cut circles down to 1.5mm diameter then they are quite correct!


The plastic sheet I used for the test was fairly thin and if you own a round punch and die set you can punch discs easily up to 2mm, however you can only go to a certain thickness before a punch won't work. Compared to the Olfa cutter it's very obvious just how smaller the gap is between the compass point and blades on this new cutter;


and remember I cut down one side of the Olfa cutter too.
In conclusion this is a useful addition to the modelling tool inventory, particularly if you scratch a lot of parts for projects and it fills the gap between 2mm and 5mm discs that I couldn't cut before. Recommended!

Circle cutter courtesy of my credit card and available from Uschi Van Der Rosten

Thursday 11 January 2018

Takom Leopard C2

While I'm in the mood for finishing stuff I applied a dark brown wash over the model a few days ago and today I painted the tools and ice cleats on the front glacis plate with Vallejo black and the canvas mantlet cover with Vallejo English Uniform.
Tonight I sprayed the model with Winsor and Newton matt acrylic varnish from their Galaria range and when dry I'll start the weathering and finally get it finished;


I was looking at the tracks earlier and the track pads need some TLC as they are far too regular and tidy so I shall attack these with a grinding tool in Dremel drill before painting them.
As to the actual model I 'was' planning on doing an actual vehicle that Takom had supplied markings for but it transpires these were fictitious ones for an OPFOR (Oppostion FORces) vehicle during an exercise. This threw me a bit as the model was already built and I had to find a picture of a Leopard with all the tools and ice cleats attached but with the minimal amount of markings. I had the Echelon decal sheet for Gagetown Leopards and the option for the C2 on the sheet features a sabretooth tigers head but I just couldn't find any reference pictures for it.
In the end I decided to do it as a generic vehicle based on what reference pictures I had so please forgive me but I had to get this model moved on.

Friday 5 January 2018

Airfix 1/48 Hurricane Mk I finished

The first one for 2018 (yes I did start it last year but...). Not a quick build as the wing roots on my example were a shocking fit but altogether it looks the part and it's quite nicely detailed. Aftermarket goodies were limited to an Eduard Zoom set for the interior, HGW seatbelts and Eduard 'Brassin' wheels and exhausts and it was painted with Mr Hobby acrylics.
One thing I would do next time is to just paint the roundels on the upper wing rather than use the decals as it would have been easier but apart from that and the few issues I had I quite enjoyed the build.
So here ya go, Hawker Hurricane Mk I R4118 UP-W from 605 sqn, Royal Air Force;


Wednesday 3 January 2018

Airfix 1/48 Hurricane Mk I

Time to get this one finished as it's been hanging around for long enough;


I sprayed the exhaust staining starting with a very thinned Tamiya X-19 Smoke then a thin coat of light grey was sprayed in the middle, after this the model was sprayed all over with matt varnish. The undercarriage door interiors and gear legs were sprayed with Vallejo aluminium and now it will all be left to dry for a couple of days as I'm back in work tonight, hopefully I can get it finished at the weekend.
Looking at the model it's going to be another '4 footer' in that it will look great from 4ft away but wouldn't stand up to any close inspection as to me it's not that good.