Showing posts with label Uschi Van Der Rosten woodgrain. Show all posts

Tuesday, 28 February 2017

Dragon Fokker E.V/ D.VIII

Yet another one pulled from the Shelf-Of-Doom is this Fokker that I started last year and promptly messed up when it came to the wing. Since then I've had a think and made a slightly different approach to the finish.
After stripping the wing back to bare plastic I resprayed it with a white gloss from a Tamiya rattle can and left it to cure for a couple of days before spraying the other side, again leaving it to set completely.
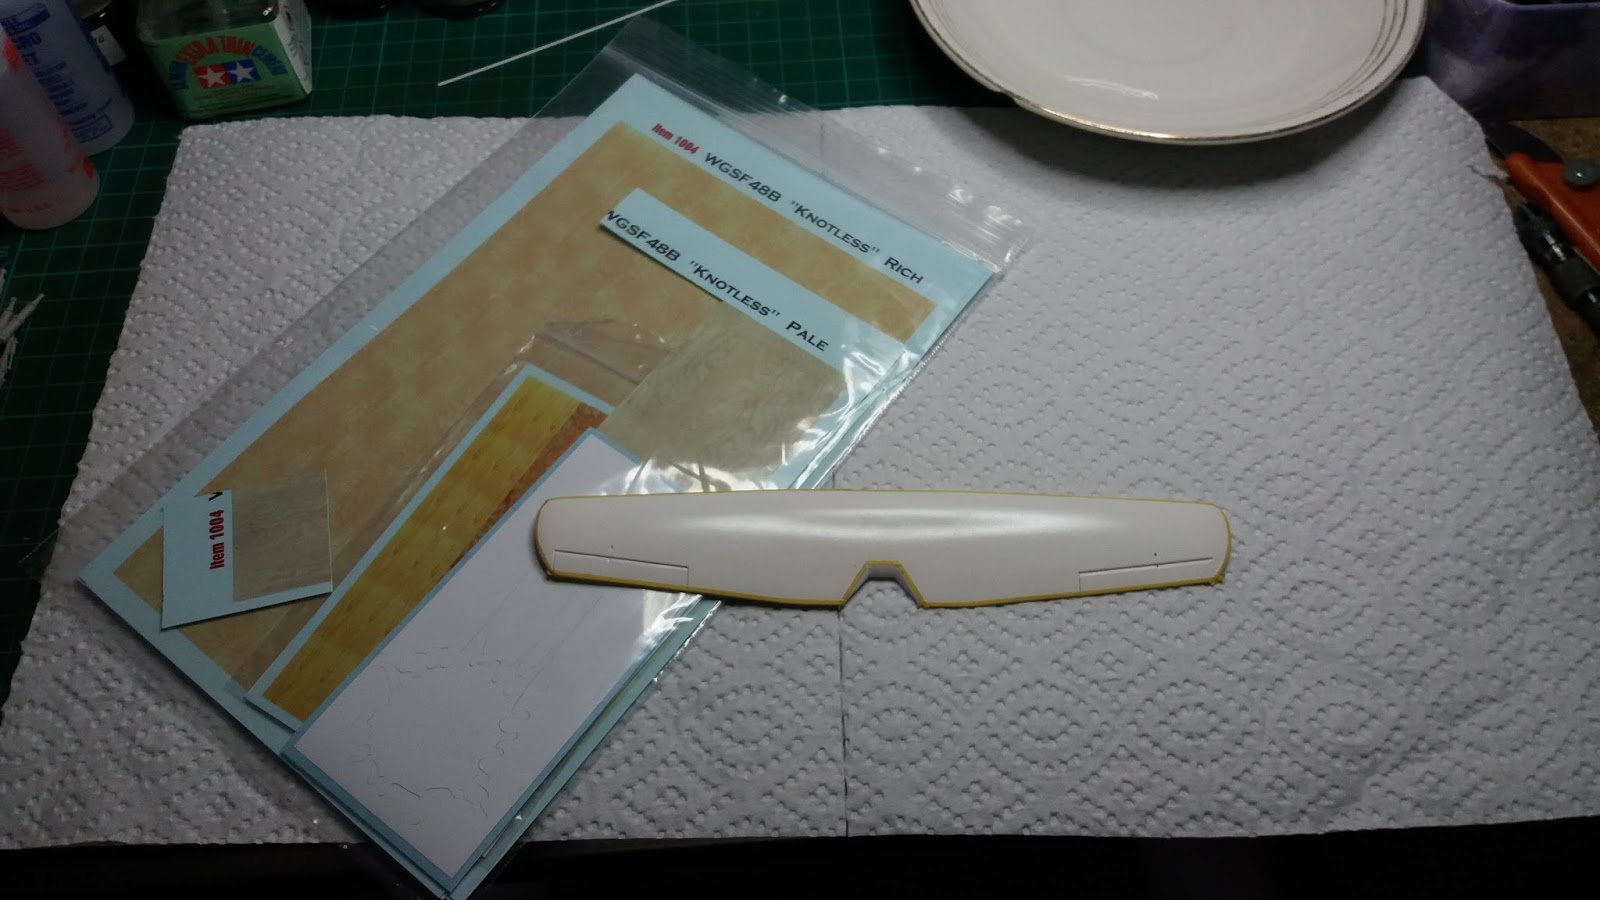
As the particular aircraft I want to model had a white strip around the wing edges top and bottom I masked off the wing using Tamiya tape cut to 1mm width;
Luckily after the last failed attempt of doing the wing I had plenty of wood grain decal from Uschi Van Der Rosten left so this was applied both sides span-wise and done in three sections; outer wings, centre section and ailerons (which had the grain chord-wise). A brand new scalpel blade was used to cut the decal around the masking tape;
The decals are VERY thin and extreme care is needed during application as they are very easy to rip, something I did in a couple of areas as you can see in the picture above and the reason I had kitchen towel underneath.
For painting I decided to use Winsor and Newton acrylic paint rather than oils with Vallejo acrylic retardent to slow down the drying time;
The underside colours were painted first, keeping the paint fairly thin to achieve the streaking effect that was a characteristic of this particular aircraft;
Due to the quick drying time I was able to paint the top surface then remove the tape, taking a LOT of care not to rip the woodgrain decal;
And that's that! Finally!! The wing will be gloss varnished next along with the fuselage and the decals for the markings will be applied and hopefully I can get this finished as it's been a very long time since I had a WW1 aircraft on the shelf.
I still would have preferred the wing in an overall green finish though....


Monday, 1 August 2016

Dragon Fokker E.V/ D.VIII

Trying to figure out how to hold the wing so that I could paint the upper surface I hit on the idea of using a clamp. I was'nt bothered about losing or smudging the paint on the leading and trailing edges as there would be a white trim around the wing that would cover them.
Doing this meant that I was able to get the top colours on, again using oils for the streaking effect and this time using Prussian Green and Vandyke Brown. The colours I have chosen are all near-as-dammit and are good enough for me, all I have to do now is wait for the oils to dry;
If you look carefully, particularly on the green bits you can see the plywood decal showing through.
This post is a bit of a milestone for me as it is the 200th so thank you to those who take the time to look in on my work.

Thursday, 28 July 2016

Fokker E.V/ D.VIII

In between undercoating the E-50 and painting skirting board in the house I had a go at painting the wing of the Fokker E.V/ D.VIII. If you recall previously I had covered the wing in Uschi Van Der Rosten plywood decal then matt varnished it. Today I used oil paints to try and recreate the streaky effect that was seen on these aircraft and I feel it has worked...more or less;
I used a piece of cardboard as a pallette to soak up some of the linseed oil as this helps the paint dry a bit quicker. The mauve seemed a little too dark straight out of the tube so I mixed in some white, the blue however looked about right. The only problem is I have to wait a week or so before I can paint the uppersurface the same way.
I'm not bothered about the leading and trailing edges as on the particular aircraft I am doing there was a white trim all the way around the wing which is provided on the decal sheet but I'll be masking and airbrushing it instead.
If you're likely to attempt this dear reader then you HAVE to be very precise with decal placement as my ham fisted way of doing things resulted in a couple of gaps between sections, luckily the worst bits are on the undersurface.
On the whole though I would have preferred a totally olive-green wing :o)

Monday, 4 July 2016

Dragon Fokker E.V/ D.VIII

A little bit more done to this as the wing was covered in Uschi Van Der Rosten woodgrain decal and matt varnished. I had to order some oil paints for the underside colours so when I get a chance I'll begin the streaky camouflage finish however being oil paint they will take a while to dry...stupid bloody hobby... :o)

Wednesday, 15 June 2016

Dragon Fokker E.V/ D.VIII

I've now completely covered the wing in Uschi Van Der Rosten woodgrain decal and after cleaning up the excess the wing will be coated with matt varnish, when dry I shall attempt the streaky camouflage colours on the top and bottom using oil paint. Obviously these will take ages to dry so in the meantime I shall start something else (as you do...);


Monday, 30 May 2016

Dragon Fokker E.V/ D.VIII

I'm reaching the end of the decalling phase (more or less) as I put the white trim on the fuselage and tail plane and started applying the woodgrain decal on the wing, I've never used so much Kleer on a model as I have on this one. The white on the tailplane will need to be trimmed as it's a bit of a mess also I'll need to mask it off and airbrush some white over the top as the decal does'nt cover the leading and trailing edges;

One of the problems I had was repairing the lozenge in places where I had cut a little too much off. I tried patching the areas with off-cuts of lozenge but in the end I mixed up various Vallejo and Andrea paints and touched up the areas instead.
Once the wing has been covered in wood grain it will be matt varnished and then painted in a streaky finish using oil paint. I might have to replace the panel on the port side as I had a bit of trouble getting it down smoothly (my fault) and I suspect there may be air trapped underneath which will lead to the decal 'silvering' after varnishing.

Saturday, 7 May 2016

Fokker E.V/D.VIII update


I managed to get the Uschi Van Der Rosten woodgrain decals on yesterday and today I gave the interior a coat of matt varnish (Winsor and Newton Galeria). I was looking at the Aviattic lozenge decal after I had applied it a week or so ago and was wondering what all the fuss was about but after a coat of matt varnish I understand why people consider them the best...WOW!
The weave pattern in it is amazing! I can't wait to do the fuselage exterior.
Uschi VDR wood grain is pretty damned good too;
Now that the interior has been matted down I can now get on with finishing it before gluing the fuselage together.