Tuesday, 28 February 2017

Dragon Fokker E.V/ D.VIII

Yet another one pulled from the Shelf-Of-Doom is this Fokker that I started last year and promptly messed up when it came to the wing. Since then I've had a think and made a slightly different approach to the finish.
After stripping the wing back to bare plastic I resprayed it with a white gloss from a Tamiya rattle can and left it to cure for a couple of days before spraying the other side, again leaving it to set completely.
As the particular aircraft I want to model had a white strip around the wing edges top and bottom I masked off the wing using Tamiya tape cut to 1mm width;
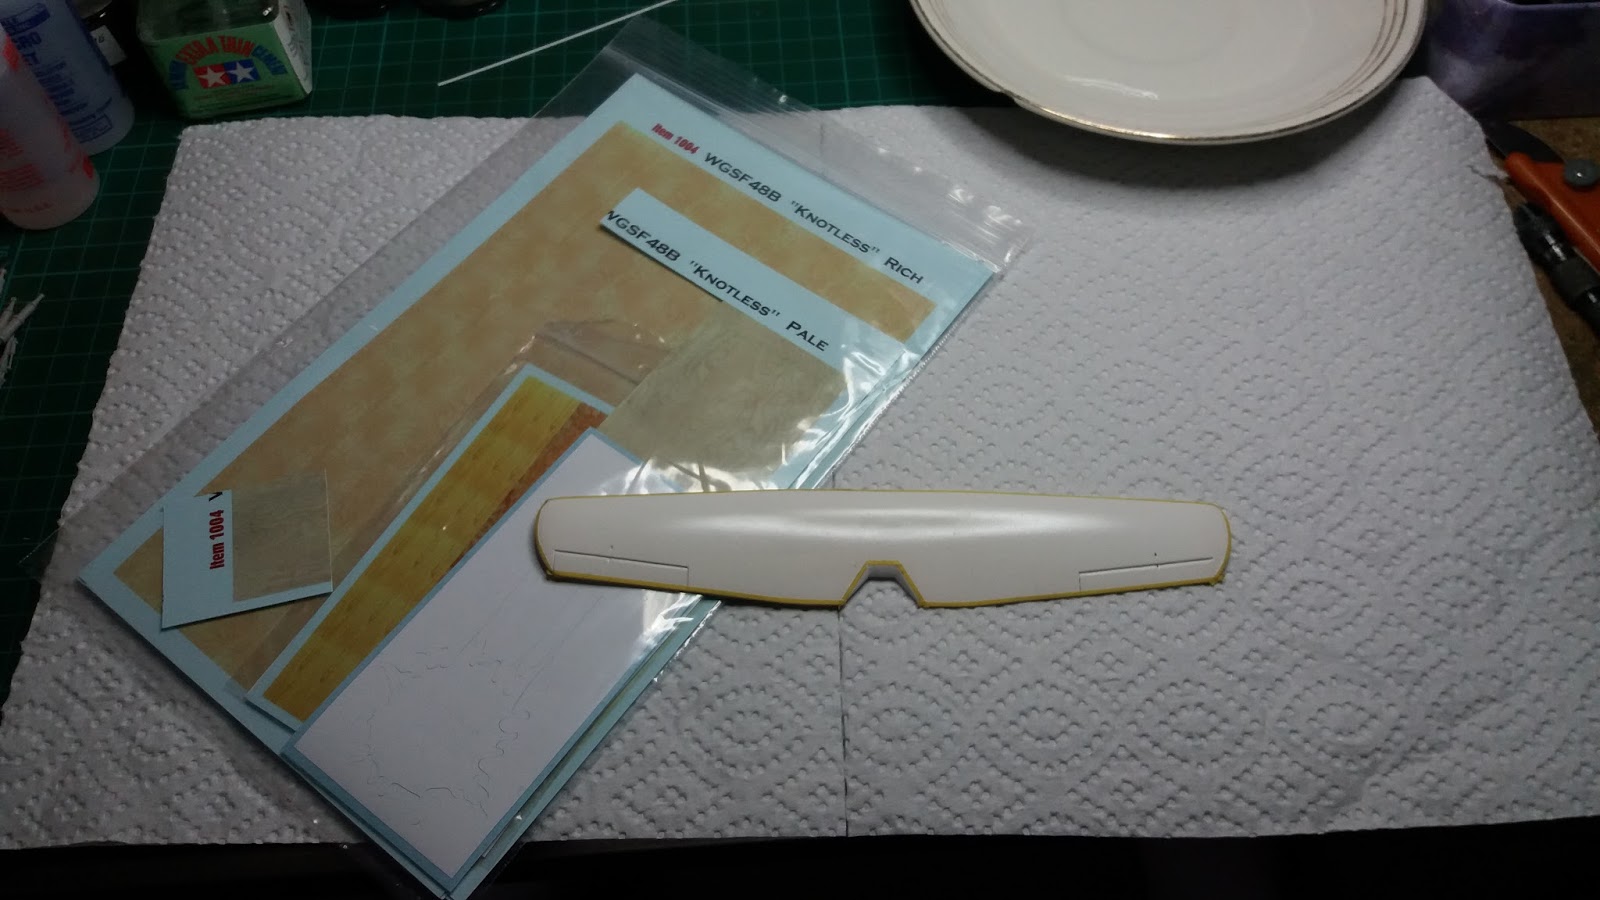
Luckily after the last failed attempt of doing the wing I had plenty of wood grain decal from Uschi Van Der Rosten left so this was applied both sides span-wise and done in three sections; outer wings, centre section and ailerons (which had the grain chord-wise). A brand new scalpel blade was used to cut the decal around the masking tape;
The decals are VERY thin and extreme care is needed during application as they are very easy to rip, something I did in a couple of areas as you can see in the picture above and the reason I had kitchen towel underneath.
For painting I decided to use Winsor and Newton acrylic paint rather than oils with Vallejo acrylic retardent to slow down the drying time;
The underside colours were painted first, keeping the paint fairly thin to achieve the streaking effect that was a characteristic of this particular aircraft;
Due to the quick drying time I was able to paint the top surface then remove the tape, taking a LOT of care not to rip the woodgrain decal;
And that's that! Finally!! The wing will be gloss varnished next along with the fuselage and the decals for the markings will be applied and hopefully I can get this finished as it's been a very long time since I had a WW1 aircraft on the shelf.
I still would have preferred the wing in an overall green finish though....


Friday, 17 February 2017

Airfix C-47

As I'm going to paint it (or try to) in a civvy scheme I needed to remove the long air intakes on top of the engine cowlings. Luckily I still had the smaller intakes supplied in the kit in the spares box so after cleaning up the chunks I've taken out of the wing (where the knife slipped) I will fit these.
I'm also hoping that when I spray the model with primer it does'nt lift the paint underneath otherwise this model will definitely be heading for landfill;
By the way this is the scheme I'm planning on doing;
The aircraft is registered as G-AMPY and ended up flying with Air Antlantique, ironically it was built for the USAAF originally before going into civilian service but apparently it is now back in military colours with the number KK116.

Friday, 10 February 2017

Trumpeter E-50 with Heimdall turret finished

YAY! The first model of the year finished (yeah I know it was started in July 2016).


For this model I used Paper Panzer Productions E-50/75 exhausts, wheels and of course their Heimdall turret. The idea behind this particular vehicle is that it would be a radar and rangefinder for a battery of E-50 Flakpanzers in case you were wondering.
I've tried adding some visual interest with the rusty panels over the engine intakes and the MG post on the engine deck painted in the lighter shade of dunkelgelb as though it was taken from another vehicle. I decided on a splinter scheme early on but the two greens just did'nt look 'right' to me so I went for a white winter finish scheme in a splinter pattern to match.
I'm not THAT keen on the amount of dirt on it but I keep getting told off for not weathering my tanks enough :o)
Different is'nt it? I know some people out there HATE the whole 'what-if/ paper panzer/ 1946' thing and at one point that included me but these days I just like the freedom that the subject brings as I don't get bogged down in researching a particular vehicle built on a Friday afternoon that was missing a bolt on the third roadwheel.


Airfix C-47


I built this a while back but the finish came out very poor as the paint went grainy during the spraying sessions. I persevered with it but it just went from bad to worse especially when the Kleer floor polish was still visible around the decals so I put it to one side and tried to forget about it.
Trouble is I spent a lot of time getting the wing roots to look good as the fit was pretty poor both sides and this fact alone has been niggling me so last night I sanded the whole model back and smoothed out the rough bits (of which there were many).
It is a shame as with the invasion stripes it did look well (apart from the gritty paint) however I'm planning on doing it in a completely different scheme so stay tuned!


Monday, 30 January 2017

S-3 Viking

I'm in the middle of doing the panel lines using Migs Panel Line Wash. I got a couple to see what the fuss is all about but actually I'm quite pleased with the results so far;

After the washes are done the model will be matt varnished and I can move onto more weathering. Getting there slowly!

Monday, 23 January 2017

S-3 Viking

As you will recall I had some issues with the large decals breaking on the fin and upper fuselage walkway. The lightning bolt decal was more problematical as the black fin showed through in places plus it would'nt conform to the top (which I knew would be an issue).
To seal the decal I sprayed the fin with Tamiya X-22 Clear and when dry I VERY carefully masked the white outline with Tamiya masking tape and used paper to cover the 'NF' code letters and the five chevrons before taping over the top of them;

The 'double nuts' (or 00) and eagle emblem were masked with Winsor and Newton masking fluid, bearing in mind I had a nightmare with the stuff on the Miniman SS-23 a while back however with the design on the decal I had no other choice.
I mixed a near-as-dammit match of Tamiya XF-7 and white with a couple of drops of X-22 to give it some shine and sprayed the fin. After this I VERY carefully removed the tape as it could have easily ripped the decal and at this point things were either going to go very well or very badly (and usually for me it's the latter).
Therefore I'm pleased to say that it worked! I did rip a small part of the white trim but touched it in with Vallejo paint. YAY for me!!

This is a good as it gets and the model will be what I call a 'four-footer' (i.e it will look great from 4ft or more), anyway I can now get on with the weathering and try and get it finished.
Maybe next time I won't pick such complicated colour schemes :o)

Saturday, 21 January 2017

S-3 Viking; Decals are on

I've managed to get the decals on the model yesterday evening and this morning and even these decided to put up a fight. The smaller decals were OK to apply (apart from folding up on themselves a few times) but the main decals for the fin and upper fuselage broke into a couple or more pieces. I knew I would have problems with fitting the decal around the fin top but I did'nt expect it to break apart.
I was hoping to get away with just touching in the fin top after the decal was applied but what this now means is after cleaning up the fin top I have to get a paint match to fill in the areas that broke, which should be fun as masking will be tricky;

The main thing is that the decals are on so the model will get a further coat of Tamiya X-22 to protect them while the model is weathered and to assist the masking of the fin;

Edit; No going back now;
I've trimmed off the excess decal and all I need to do now is get an exact match of red paint. How hard can it be? :o)